Leather Glove Care Made Simple: Clean and Maintain

Few things can look as good or feel as comfortable or work as well as leather gloves. Whether they be brand gloves, custom work gloves, custom leather gloves with logo, or just a pair that has been in your family for ages, leather gloves can last a lifetime, feel great, and work incredibly well too.
But everyone knows that the more you like gloves, the more you’ll use them. And, sadly, the more you use gloves, the more they will start to fall apart and experience typical wear and tear.
It is true that leather gloves last longer than many other types of fabric but that doesn’t mean they are immune to the depreciation that can impact all types of gloves - and, really, all types of clothing.
Some people spend hundreds of dollars every year making sure that their leather gloves are still in the best condition possible. But, honestly, that is a waste of money and time. That is because you can actually take care of your custom leather gloves all on your own. You don’t have to fork over a bunch of cash to an expert who will only be charging you more for what you can do at home.
By following just a few simple steps, you will keep your leather gloves looking and feeling brand new and you will never again have to spend money on a service that is completely unnecessary.
Most types of leather gloves will look new and feel great after the method we will go over. But it is important to keep in mind that some types of leather gloves, such as suede leather, require a different type of process to get the job done.
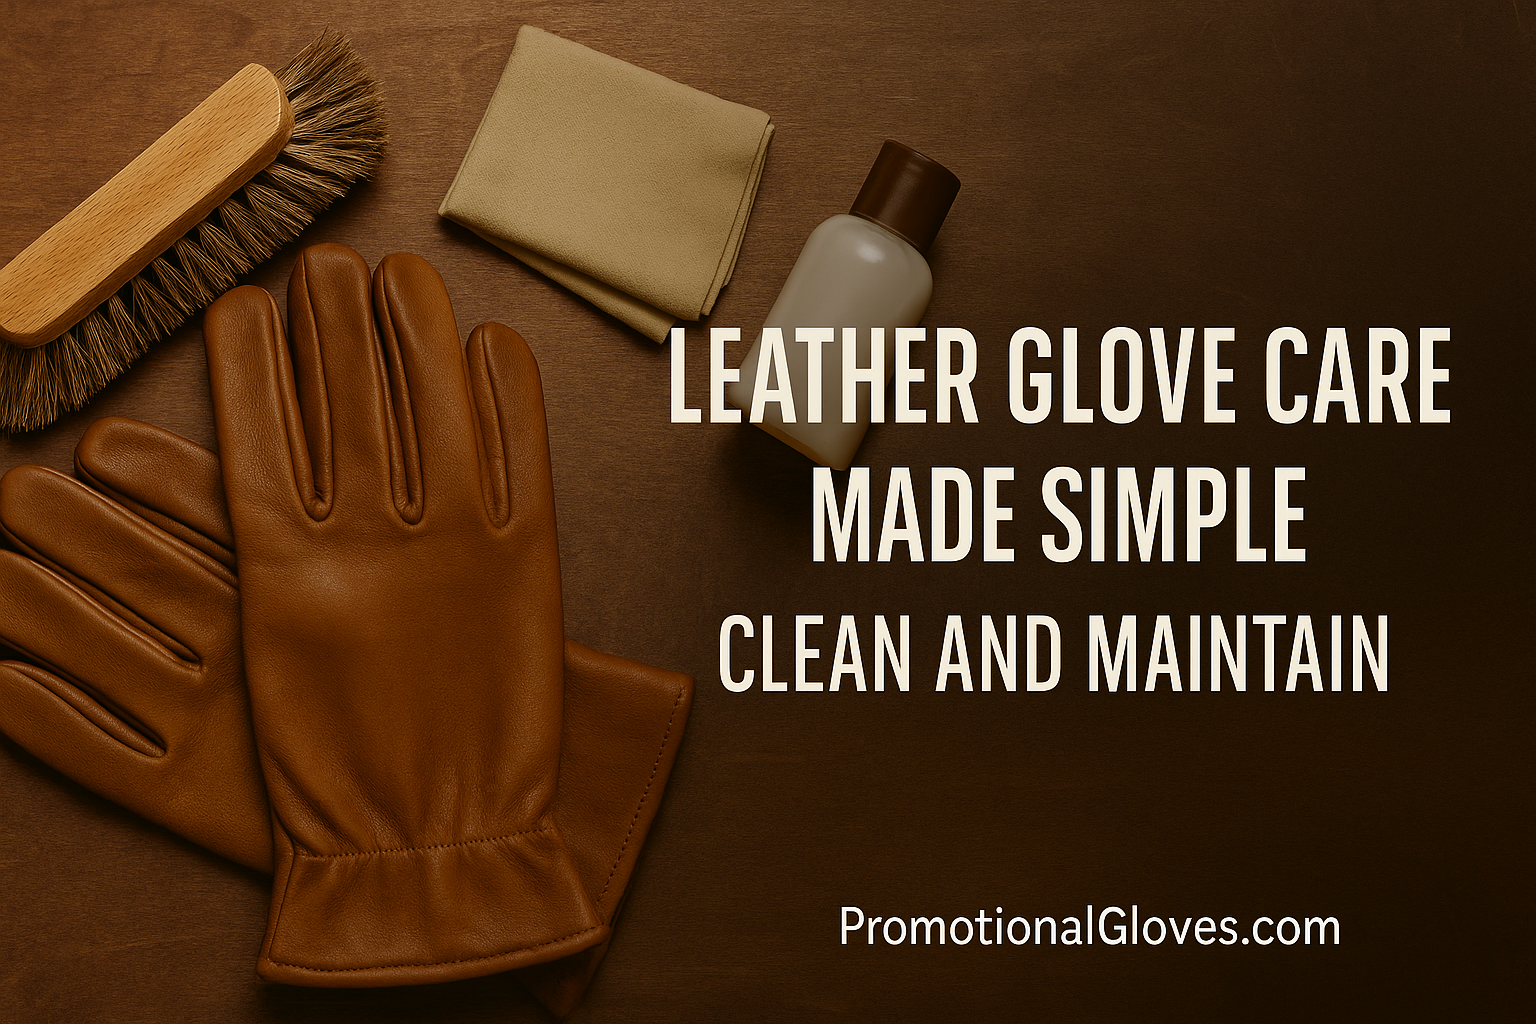
Pretreat The Soil
Before you do anything, you need to pretreat the heavy soil of the leather gloves you own.
Remember that leather is a very valuable and durable material but that also means that it can’t just be scrubbed with soap and then dried like many other fabrics.
Therefore, the first thing to do is pretreat the heavy soil. You do this by taking a small bowl and stirring together a solution that is equal parts warm water and distilled white vinegar together. You will then take a microfiber cloth and wet it with the solution you made.
From there, softly wipe the stained areas on the gloves. If the gloves are covered with dried mud, you can simply use a soft-bristled brush to wipe it away.
Remove The Ink Stains
You need to then remove the ink stains from the leather and doing this is quite simple. All you need to do is find a Q-tip or piece of soft cotton and dip it quickly in rubbing alcohol. Any type of rubbing alcohol will do, as long as it is isopropyl.
When you are following this step, you need to begin at one end of the stain and then gently rub it away in one direction with the swab. Do not scrub and make sure to not scrub hard either. This can easily damage the leather.
You will see that any ink on the glove will start to come off and transfer to the Q-top or cotton you’re using. You should regularly throw away your Q-tips or cotton and replace them with new ones as the process goes on.
Create The Cleaning Solution
Take a small bowl and make a solution of warm water mixed with liquid soap, like the stuff you use with your dishes. Then you will again wet a microfiber cloth and spread it across the leather.
You will lay your leather gloves on a towel and use the soapy cloth to wipe off the muck and grime and dirt that has caked them.
It is very important that you touch upon every part of the glove. Many people forget to go in between the fingers, on the underside of the palm, and the base of the gloves near the wrists.
It is also important that you can’t overdo it. Don’t put too much of the solution on the gloves because that will stain and ruin them.
Don’t Forget The Inside
Far too many people pass over the interior of the gloves but it’s vital to clean that part of the glove too. The inside of the glove might actually be dirtier and grimier than the exterior. Think about it: this is where you swear and the dirt from your own hands compiles.
You should turn your leather gloves inside out and repeat the cleaning process you just did. Wipe down the interior with your mix of soap and vinegar and a healthy helping of water to wash away any odor.
Time To Rinse
The next step of the process is the rinsing step and it requires that you use a clean and damp microfiber cloth to wipe away any residue that might be collecting on the gloves. Make sure you pay specific attention to the seam and the areas between the fingers.
It is also vital that you let the air dry the gloves at this point too. Leave them on a dry towel but do not put them in direct sunlight or near a heat source. This will only make the lather cake, crack, and the gloves shrink.
This part of the process might take a long time so you should check on the gloves often. Don’t be surprised if a few hours go by and they are still feeling damp. You need to be patient. But you should also keep in mind that most leather gloves usually take about 8 hours to dry.
Condition
If you want to keep your gloves feeling very soft, you should buy a commercial leather conditioner and apply it to the exterior of your gloves once they are totally and completely dry. The good news here is that any conditioner product will give you step-by-step instructions that will help you follow this process with ease.
In Conclusion:
No matter if they are personalized gloves or printed gloves with logo, cleaning your leather gloves can be an all-day affair so you should be sure to set aside a good amount of time to get it done. But the good news is that it doesn’t need to be done that often as long as you take good care of your gloves throughout the year.